Comprehensive Guide to Photographing Lightning
f/8.0
20 seconds
ISO 320
While attending photography classes at the University of Central Florida, I got the idea in my head that I wanted to get a photo of lightning. Up to that point, I had pretty much focused on sports photography, but wanted to do something different. After several failed attempts, I finally caught my first lightning bolt from my driveway. I never looked back from there. Lightning was really what caused me to fall in love with photography.
Safety First
Make no mistake, lightning is extremely dangerous. It is the most unpredictable element of thunderstorms. The average person has about a 1 in 10,000 chance of being struck by lightning, but if you're intentionally going out into thunderstorms those chances increase dramatically. In the first half of the 20th century, an average of about 400 Americans died each year from lightning strikes. That number has decreased significantly with an average of 32 lightning fatalities per year since 2006. Much of this can be attributed to the National Weather Service's efforts on raising awareness about the risk of lightning strikes with their "When Thunder Roars, Go Indoors" campaign. The general rule is, if you can hear thunder, you're close enough to be struck by lightning.
f/22.0
4 seconds
ISO 50
Use your head while doing this kind of thing. If you feel uncomfortable, trust your instincts and get out of there. Avoid open areas, and try to make sure you aren't the tallest object around. Likewise, be sure you aren't standing near the tallest object around, for example a large tree. If that large object is struck, lightning could travel through the ground or even arc through the air, straight to you. One way of minimizing your exposure is to use devices such as lightning triggers and intervalometers. The great thing about these devices is that you can set them up on your camera, and seek shelter in the relative safety of your vehicle. It's all about minimizing the amount of time you are vulnerable to being struck.
What You Need To Photograph Lightning
- A tripod
- A DSLR or other camera capable of shooting longer exposures.
- Radar App for your smartphone. (Radarscope is a great one)
- A remote trigger (Intervalometer or Lightning Trigger)
- Rain protection for your camera
Getting Your Shot
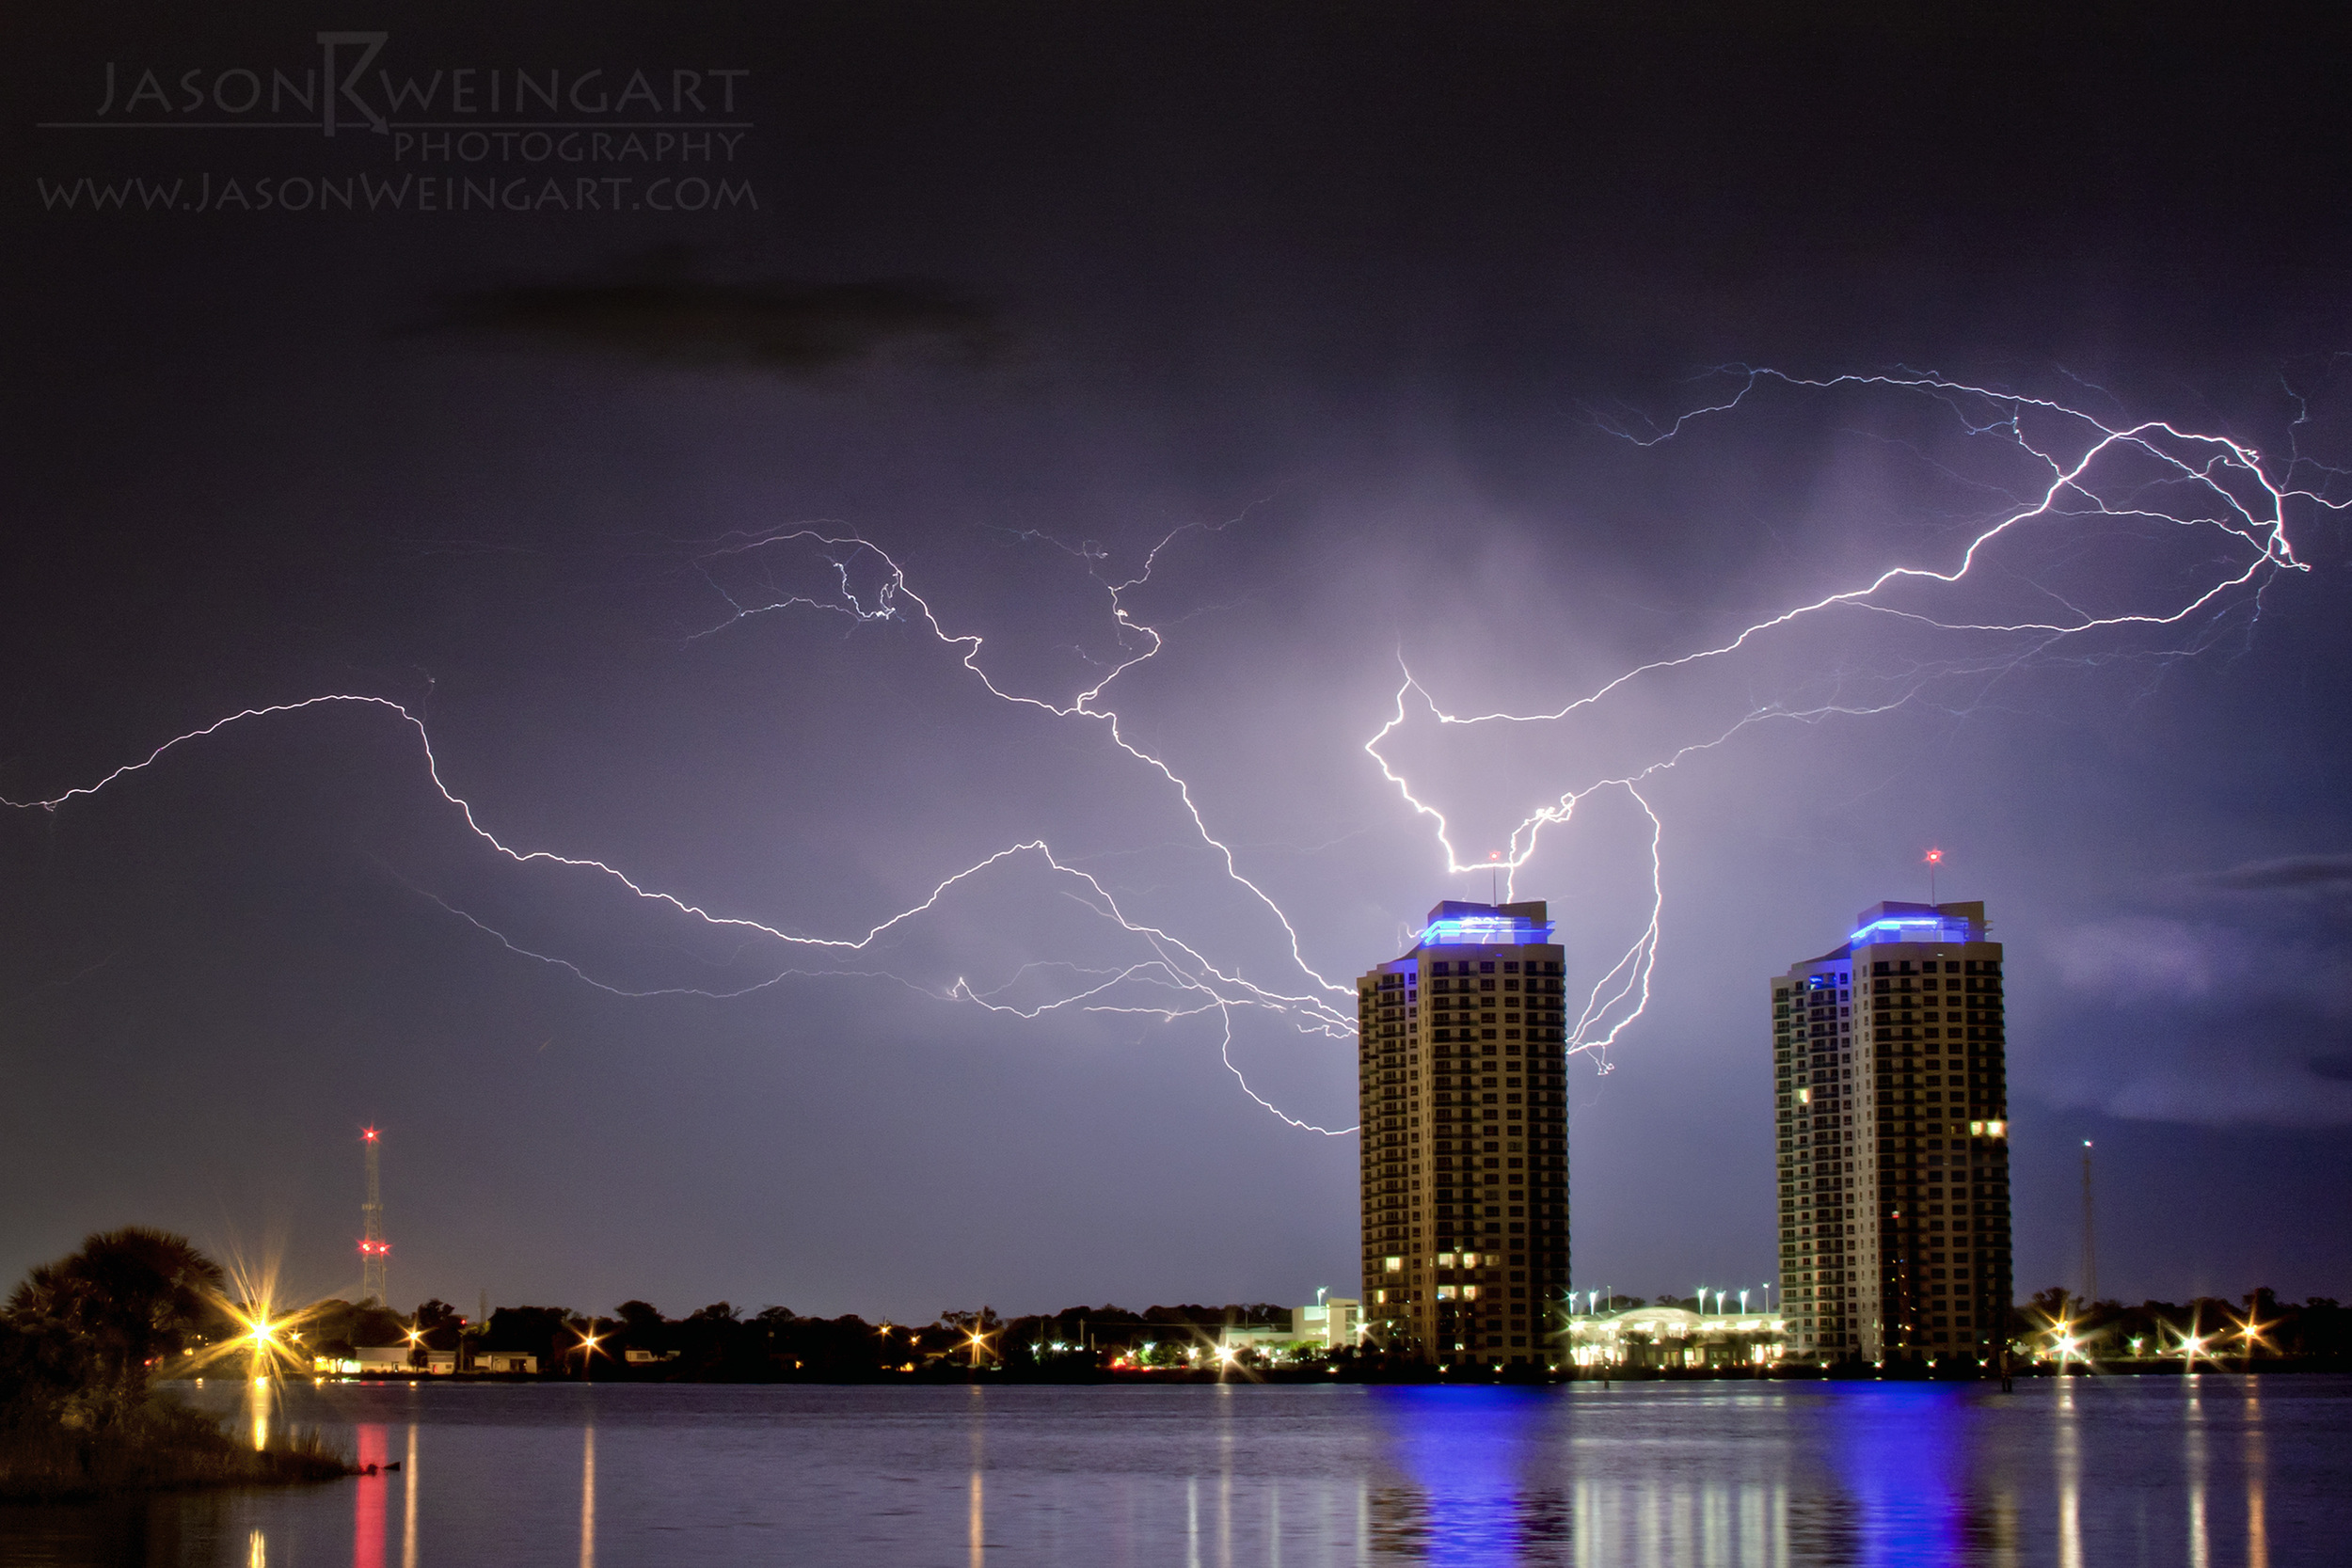
Your best shots will usually come from the outer edge of the storm. You really don't want to be shooting from the core of the storm, where all the rain is. You most likely won't be able to keep your lens clean enough to get a good shot. Your only option at that point is shooting out of your car. If you are under the anvil of the storm (where the lightning can sometimes be brilliant), there may be light to moderate rain present. In which case you can setup under an awning of some type, utilize an umbrella, or even setup your tripod in your car. The shot below illustrates anvil crawler lightning, and since it was raining at the time, I setup my camera on a tripod in my car and shot out of the passenger window.
f/13.0
25 seconds
ISO 320
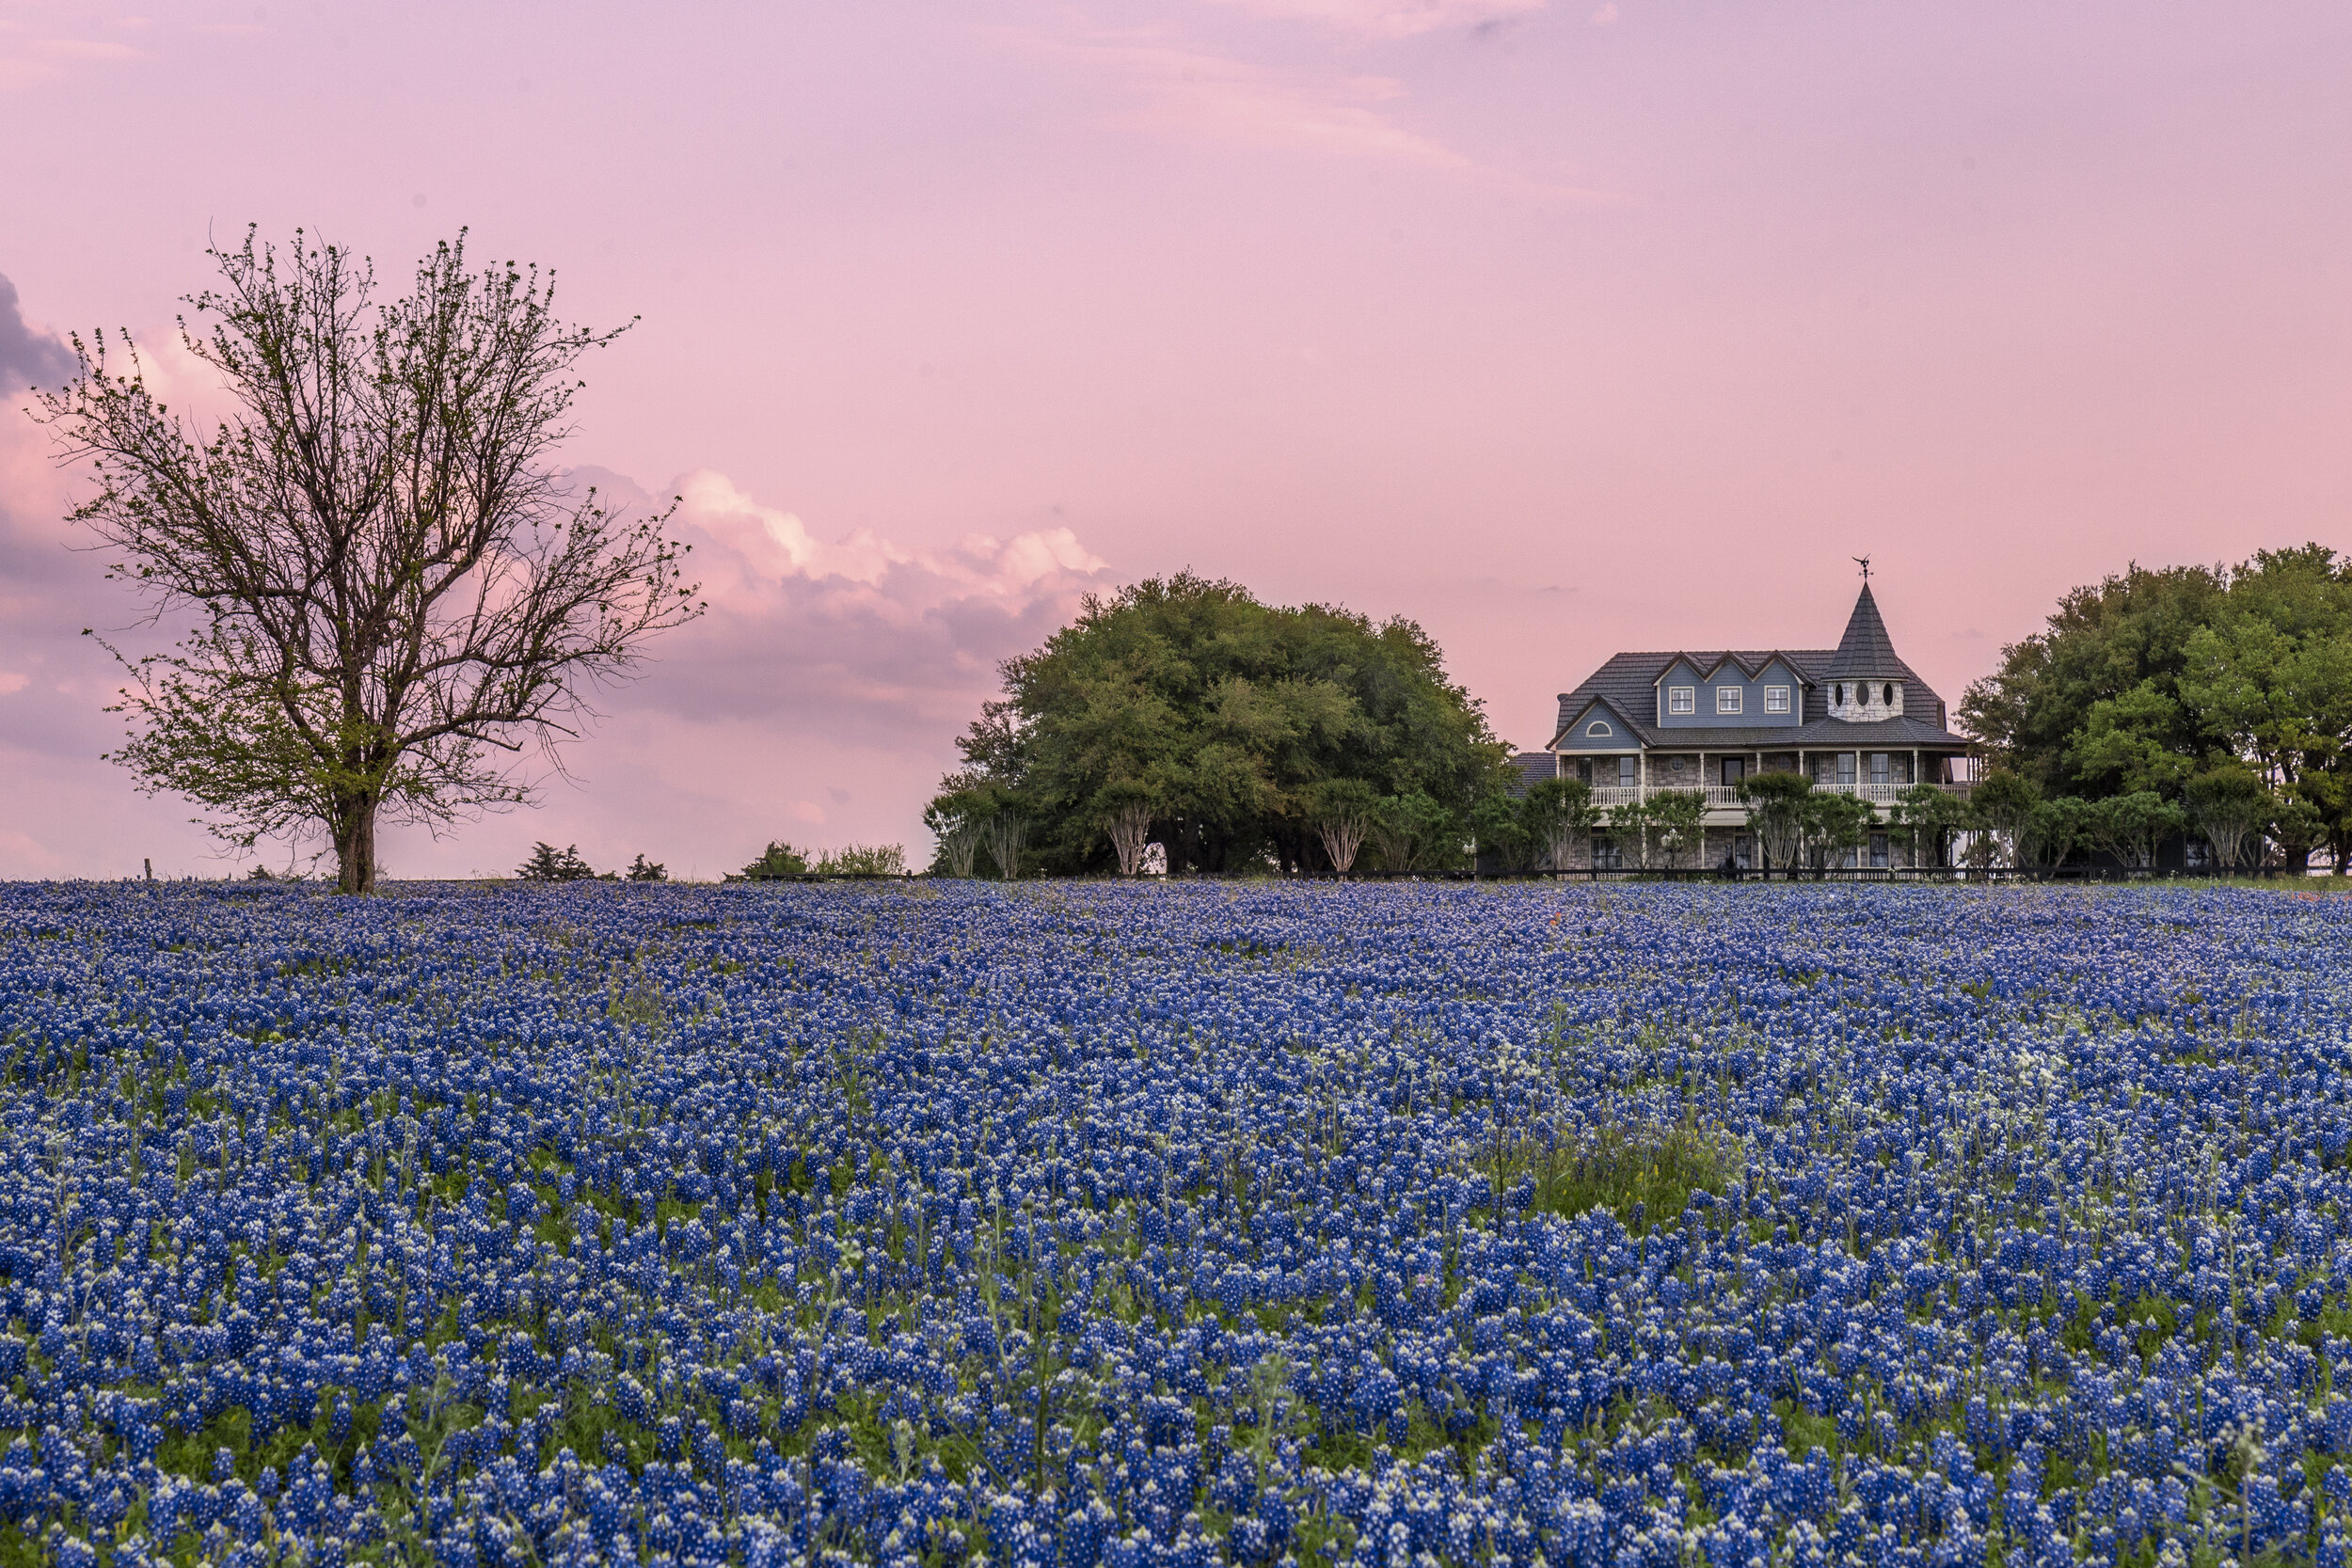
Try to compose your shot in an interesting way. It should look good even without the lightning, so once you do get some in the shot, it will add to an already good image. If you want your pictures to stand apart from everyone else's, find a compelling foreground. There are millions of lightning photos out there. What can you do to make yours different?
One mistake people often make is exposing only for the scene and not factoring in the lightning. You want to be sure your lightning isn't overexposed, but at the same time you need to have some light in your foreground to add depth to the image. If you aren't already shooting in RAW, you need to, especially when it comes to lightning. You will be able to recover a lot more details in your shadows and highlights, change the color balance, and make a host of other adjustments that you wouldn't be able to with a jpeg file.
f/16.0
30 seconds
ISO 100
f/16.0
30 seconds
ISO 100
There are basically three types of times to shoot lightning, and your technique will vary depending on which of these times you are shooting. If you're just starting out shooting lightning, I suggest doing so at night. You can use long exposures, and shoot continuously, which will give you a much better chance of success than trying to catch lightning during the daytime.
Nocturnal Lightning
To photograph lightning at night:
- Setup your camera on a tripod. Attach an intervalometer to the camera to eliminate any potential camera shake.
- Turn off any image stabilization your lens may have. Len stabilization simply creates a vibration to counteract any possible movement by the user, so if your camera is tripodded, it will be creating a vibration for no reason and may lead to a soft image.
- Manually focus your lens to infinity. The best way to do this is by switching to the live view setting on the camera, and zooming in on a distant light source on your LCD screen. Turn the focus ring until the light appears tack sharp.
- Now to come up with your settings. I'm often asked by people what settings they should use for lightning. Well there's really no definitive answer to that question. There are a ton of variables to consider that may effect what settings you want to use.
- How close is the lightning? Well if it's closer and/or strobing several times, you need to stop down your aperture, and keep the ISO relatively low to prevent blowout.
- What type of lightning is it? Exposing for close cloud to ground lightning, and distant inner cloud lightning calls for dramatically different settings.
- How fast are the clouds moving? If a storm is moving very quickly and the lightning is flashing a lot, you will want shorter exposures to avoid ghosting effects (repeated exposures of the same shape as it moves and the lightning lights it up) in the clouds.
- How much ambient light is in the scene? If there are a lot of bright lights in your scene you need to have shorter exposures and use a lower ISO.
- Do you want to make a timelapse out of the images? If so, shooting 30 second exposures won't make much sense, since your timelapse will probably only last a few seconds. You need to shorten your exposures, by bumping up your ISO and opening up your aperture.
Close Lightning
f/13.0
30 seconds
ISO 100
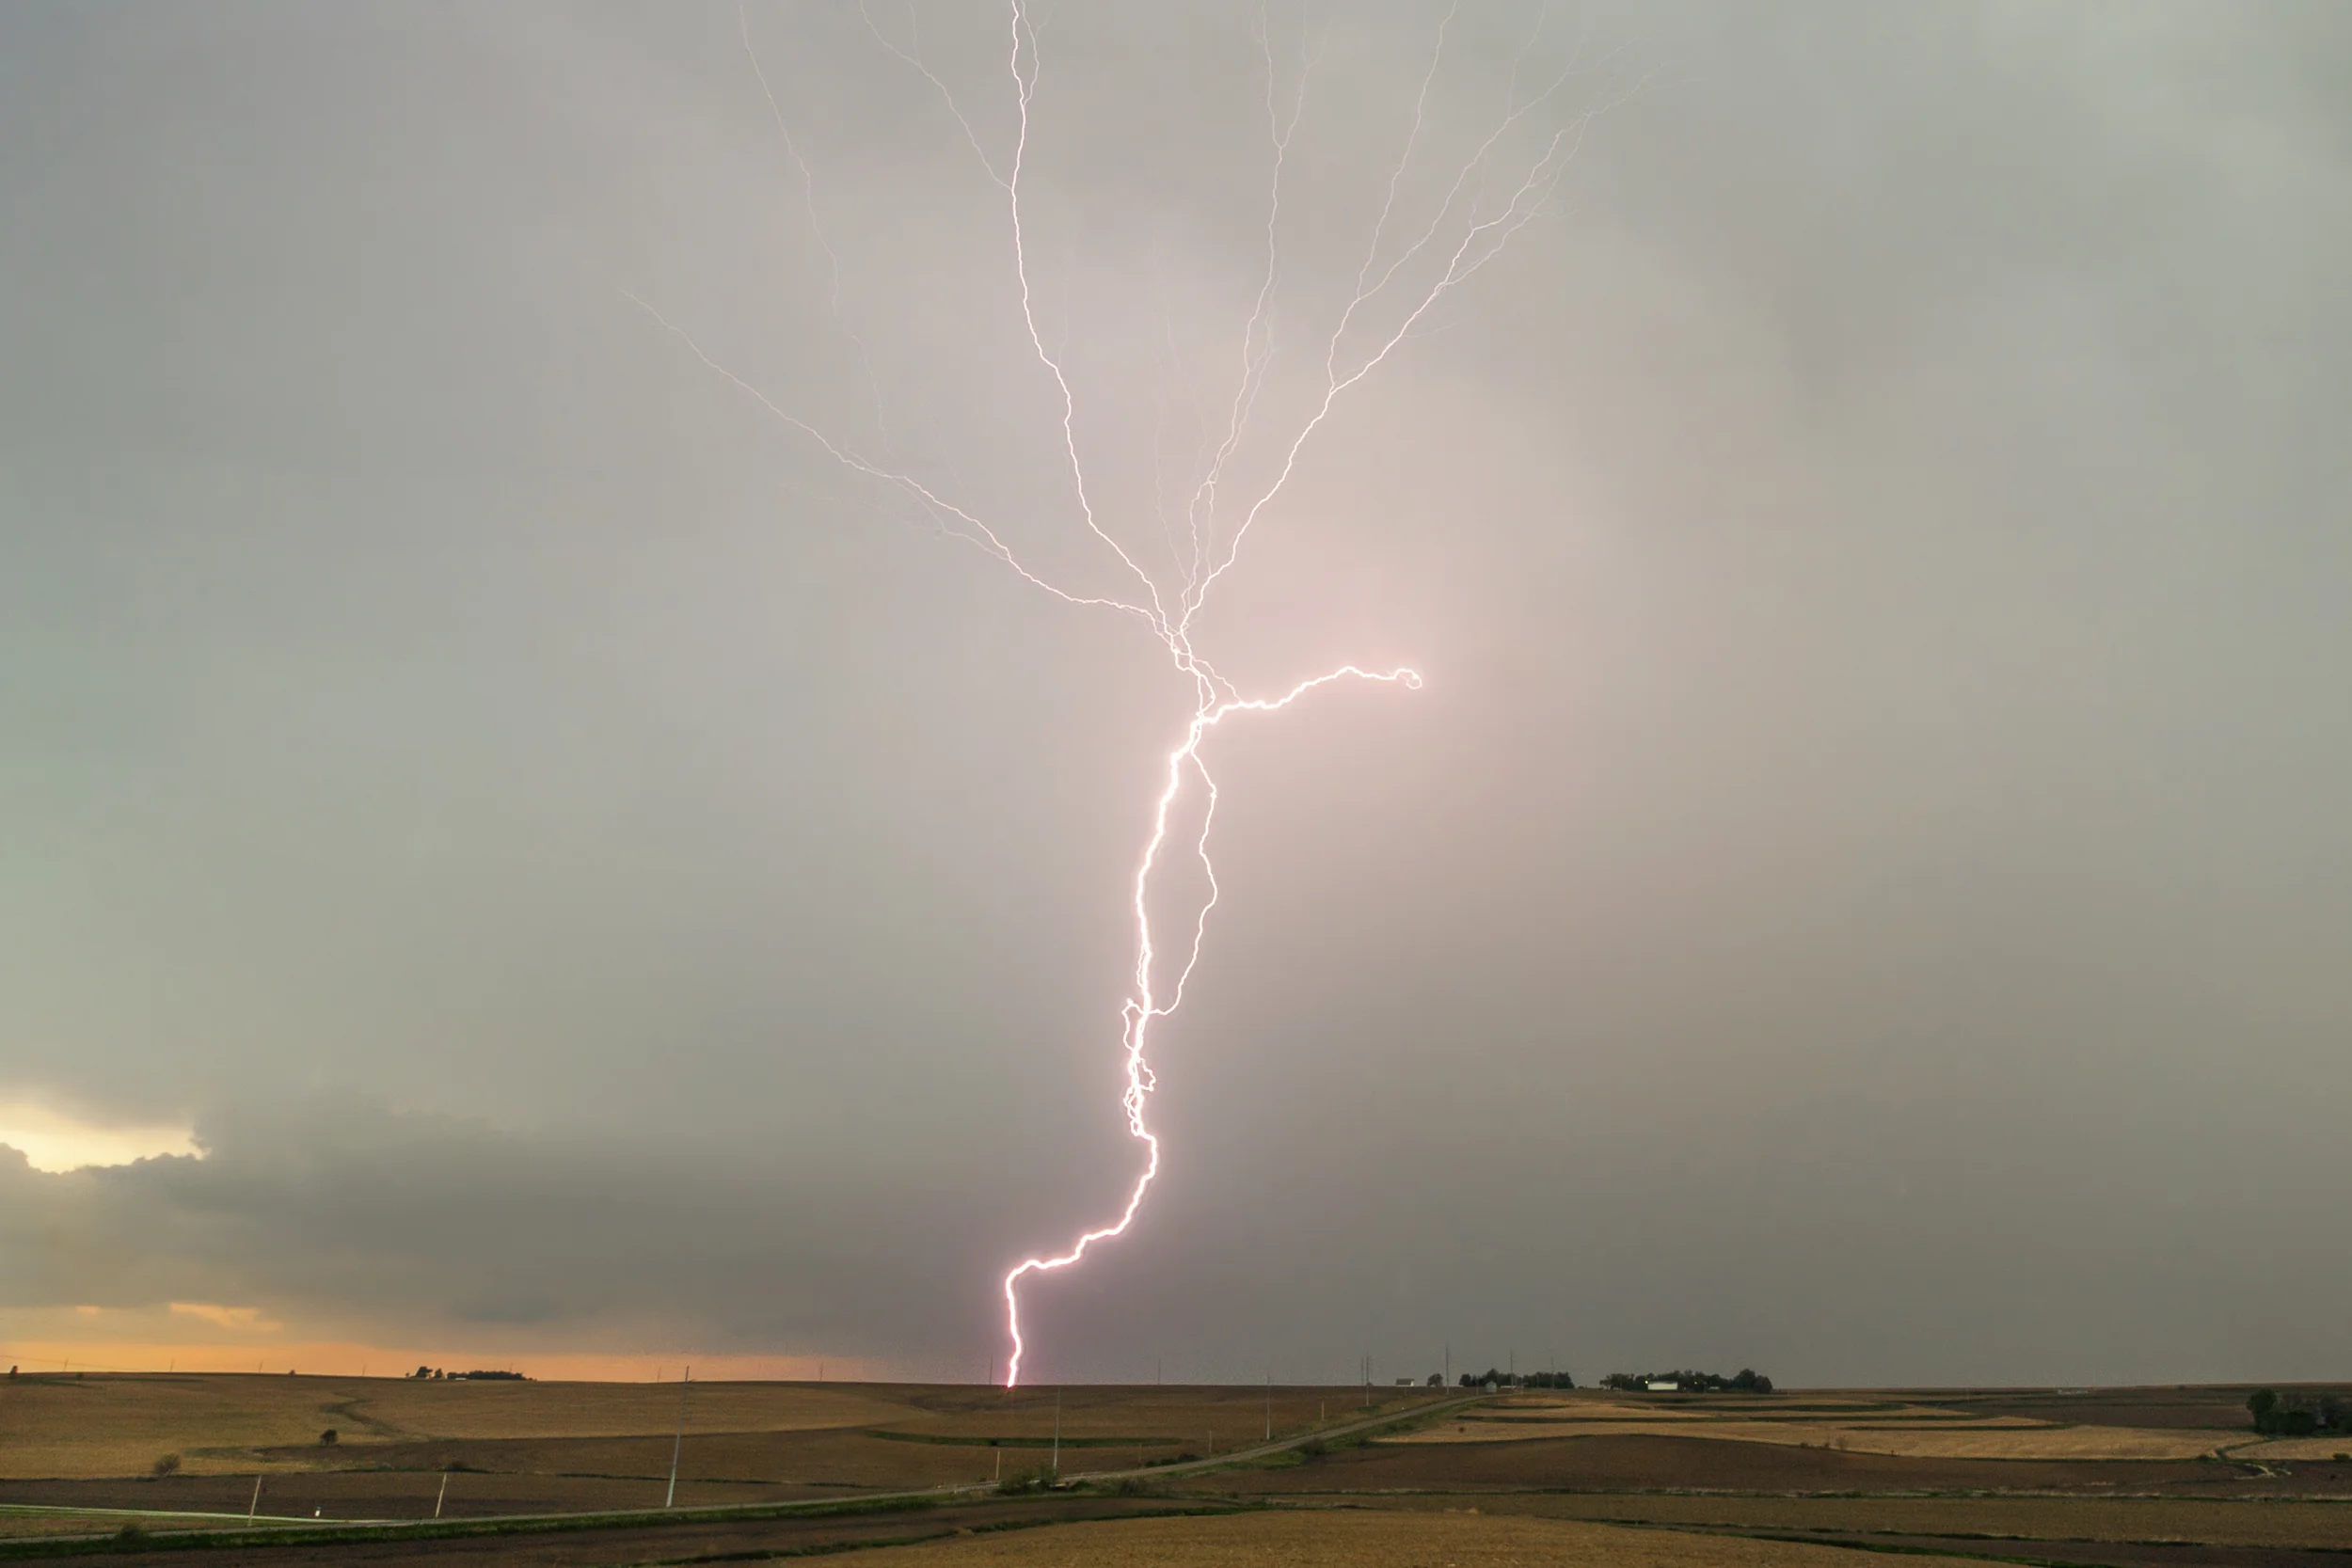
Distant Lightning
f/8.0
8 seconds
ISO 500
Bright objects in foreground
f/13.0
25 seconds
ISO 200
Fast Moving Clouds
f/8.0
15 seconds
ISO 500
Shooting with a timelapse in mind.
f/6.3
8 seconds
ISO 640
5. Get a test exposure with some lightning in it. Double check to make sure your shot is properly focused and that your settings are appropriate for the lightning you will be shooting. There's nothing worse than getting the lightning, but it being out of focus or exposed incorrectly. Be sure that you will be able to recover sufficient detail in the shadows in your foreground.
6. Lock your intervalometer down, and let it continuously shoot. Don't move your camera, so you can make a timelapse or an image stack out of your images.
Timelapse of a mesocyclone with positive cloud to ground lightning barrage over a field of lightning bugs in Weston, Missouri on June 29, 2014.

42 stacked images for lightning bugs and lightning
f/6.3
8 seconds each
ISO 640
If you leave your camera in one spot while shooting, you can combine all of the images into an apocalyptic looking lightning stack. The image to the right was made by using the photos from the timelapse above of a nocturnal mesocyclone in Weston, Missouri. Learn more about the process of stacking lightning images (coming soon).
Daytime Lightning
Shooting lightning during this time of day can be tricky. You have a few options.
To photograph lightning during the day:
- Setup your camera on a tripod. Attach an intervalometer or lightning trigger to the camera to eliminate any potential camera shake.
- Turn off any image stabilization your lens may have.
- Manually focus your lens to infinity. The best way to do this is by switching to the live view setting on the camera, and zooming in on a distant object on your LCD screen. Turn the focus ring until the object appears tack sharp.
- Take a test shot and make sure your foreground has sufficient detail. I suggest trying to stop down to f/16.0, or more if needed, and setting your ISO as low as possible.It's a common misconception that you need to shoot fast shutter speeds to catch lightning. It's the opposite, the longer your lens is open, the more chance of something good happening in it.
- This is where you have a few options on how to go about getting that photo of daytime lightning.
- The first is to try to catch the lightning as it happens. You have to react extremely fast to get an image of lightning with this technique, and 9 times out of 10, even if you capture the bolt, you will only catch the return stroke, and not the branching that is visible when the lightning first occurs.
- Another option is to use a lightning trigger. These devices attach to your camera and will trip your shutter when a flash of light is caught by its sensor. There are a wide array of lightning triggers on the market and they can range anywhere from $60-$400. I have used these in the past, but have gotten away from them recently. I will say that you will have much more success with shooting lightning during the day.
- The last option for shooting lightning during the day is to try to close down your aperture to f/22 or greater, set your ISO to as low as possible, then set your shutter speed as slow as possible, and just shoot continuously. This is probably the best way to go for capturing daytime lightning. The only downfall is your card will fill up pretty quickly, and your camera may lag if it's older and has trouble processing all those images.
Handheld. Manually Pressing Shutter
f/10.0
1/60th second
ISO 125
Lightning Trigger
f/13.0
1/20th second
ISO 100
Stopped Down Aperture. Shooting Continuusly
f/16.0
1 second
ISO 50

Sunrise/Sunset Lightning
This is the best time to shoot anything, and that is especially true with lightning.You can expose for a handful of seconds with a relatively stopped down aperture, at low ISO and still retain tons of foreground detail. Not to mention that sometimes, the colors in the sky can be extraordinary.
To photograph lightning at night:
- Setup your camera on a tripod. Attach an intervalometer to the camera to eliminate any potential camera shake.
- Turn off any image stabilization your lens may have. Len stabilization simply creates a vibration to counteract any possible movement by the user, so if your camera is tripodded, it will be creating a vibration for no reason and may lead to a soft image.
- Manually focus your lens. The best way to do this is by switching to the live view setting on the camera, and zooming in on a distant light source on your LCD screen. Turn the focus ring until the light appears tack sharp.
- Now to come up with your settings.
- You won't be exposing for still photographs of innercloud very much during sunrise/set. The ambient light will mostly wash it out. You're going to focus on bolts of lightning during this time, either cloud to ground or cloud to cloud. Once the sun gets to be further below the horizon, you will be able to pickup more of the faint details of innercloud lightning.
- Expose for the overall scene, and then be sure the lightning won't be blown out in the image. If the lightning is striking close, you will want to stop your aperture down more. If it's distant, you can open up much more.
Close Lightning at Dusk
f/14.0
5 seconds
ISO 160
Moderately Distant Lightning at Dusk
f/8.0
20 seconds
ISO 100
Moderately Distant Lightning at Sunset
f/6.3
6 seconds
ISO 100
Distant Lightning at Dusk
f/5.6
8 seconds
ISO 1000
5. You're going to want to slightly overexpose during this time, especially if shooting timelapse. It will help you maximize detail in your foreground, and your settings will slowly become underexposed as the sun sets further below the horizon.
6. Take a test shot. Zoom in on the LCD and be sure you are in focus and your exposure is proper.
7. Lock down up your intervalometer, and shoot continuously. A lightning storm at sunset or dusk makes for an awesome timelapse.